

Building your own PC might sound intimidating at first, but it's actually a fun and rewarding project. Whether you're looking to save money or customize every detail, this guide will walk you through how to build a PC step-by-step in 2025. With a little patience and the right tools, you'll have a machine that’s tailored to your needs.
Key Takeaways
- Start with a clean, static-free workspace to avoid damaging your components.
- Make sure all your parts are compatible before beginning assembly.
- Organize your cables for better airflow and easier troubleshooting.
- Test your PC before installing it into the case to catch any issues early.
- Regular maintenance, like cleaning dust and updating drivers, keeps your PC running smoothly.
Essential Tools and Workspace Setup
Gathering the Right Tools for the Job
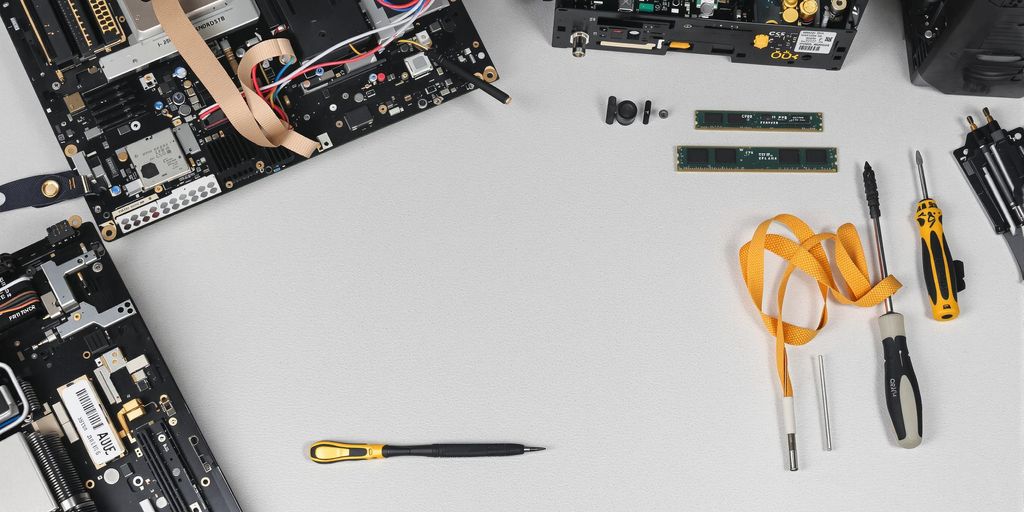
Before you even think about cracking open a PC case, make sure you have the right tools ready. Having the proper tools can save you time and frustration. Here's what you'll need:
- Magnetic Screwdriver Set: A set with Phillips and flathead bits of various sizes is a must. Magnetic tips help keep screws from vanishing into your carpet.
- Needle-Nose Pliers: Perfect for handling small clips and tight spaces.
- Anti-Static Wristband: Reduces the risk of frying sensitive components with static electricity.
- Thermal Paste: Essential if your CPU cooler doesn't come with pre-applied paste.
- Magnetic Parts Tray: Keeps all your screws and tiny parts organized.
- Cable Ties: A cheap and effective way to keep your build tidy.
Optional but helpful: a flashlight or LED light for better visibility and a small vacuum or compressed air to clean your workspace.
Preparing a Static-Free Workspace
Static electricity is your worst enemy when building a PC. Follow these tips to create a safe environment:
- Choose a Hard, Flat Surface: Avoid working on carpet or fabric-covered tables. A wooden or metal desk works best.
- Use an Anti-Static Mat: Place this on your workspace to ground yourself and your components.
- Wear an Anti-Static Wristband: Clip it to a grounded object, like your PC case, to discharge static electricity.
- Keep Pets and Drinks Away: Spills and fur can ruin your components. Trust me, it's not worth the risk.
A static-free workspace isn't just about protecting your components—it's about peace of mind. Knowing you've minimized risks lets you focus on the fun part: building your dream PC.
Organizing Components Before Assembly
Before diving into the build, take a few minutes to organize everything. It'll make the process smoother and less stressful.
- Lay Out All Components: Place your motherboard, CPU, RAM, storage drives, and other parts in separate areas.
- Check Manuals: Skim through the manuals for your motherboard, case, and other components. Familiarize yourself with their layouts and instructions.
- Group Screws and Accessories: Use a magnetic tray or small containers to sort screws and brackets by type.
- Double-Check Compatibility: If you haven't already, confirm that all your parts are compatible. Tools like PC Part Picker can help you avoid last-minute surprises.
Taking a little time to prep your tools, workspace, and components will set you up for a smooth, enjoyable build.
Choosing the Right Components for Your Build
Understanding Compatibility Between Parts
Building a PC is like solving a puzzle—every piece needs to fit perfectly with the others. If you mess up compatibility, your build won’t work, period. Here’s what to double-check:
- Motherboard and CPU: Match the motherboard’s socket type with your CPU. For example, Intel’s LGA 1700 socket fits their latest processors, while AMD’s AM5 is for newer Ryzen chips.
- RAM: Your motherboard dictates whether you need DDR4 or DDR5 RAM. Most new boards support DDR5, but older ones might not.
- Case Size: Make sure your case can fit your motherboard (ATX, Micro-ATX, etc.), graphics card, and cooler.
- Power Supply (PSU): Ensure your PSU provides enough wattage for all components. A 500W PSU is a safe starting point for most builds.
A handy tool like PC Part Picker can save you headaches by flagging any compatibility issues before you buy.
Selecting a Case That Fits Your Needs
Your PC case isn’t just a box; it’s the home for all your components. Think about:
- Size: Do you want a compact build or a full tower? Smaller cases save space but limit your options for upgrades.
- Airflow: Look for cases with good ventilation to keep your system cool.
- Aesthetics: Do you want RGB lighting, a glass side panel, or something more subtle?
For example, a mid-tower like the Corsair 4000D Airflow is a great balance of size, cooling, and price.
Balancing Performance and Budget
Let’s be real—your budget will shape your build. Here’s a quick breakdown:
| Build Type | Estimated Cost | Example Components |
|---|---|---|
| Budget Build | $500-$800 | Ryzen 5 CPU, GTX 1660 GPU |
| Midrange Build | $800-$1500 | Core i5 CPU, RTX 3060 GPU |
| High-End Build | $1500-$4000 | Ryzen 9 CPU, RTX 4090 GPU |
Discover ideal components for your next PC build to see tailored options for every price range. Remember, spending more on a high-quality PSU or motherboard can save you money down the line by avoiding early replacements.
Take your time when choosing parts. Rushing leads to mistakes, and mistakes cost money. Plan carefully, and you’ll thank yourself later.
Step-by-Step Assembly Process
Installing the CPU and Applying Thermal Paste
- Start by locating the CPU socket on your motherboard. It's typically covered with a small protective cap.
- Carefully remove the cap and lift the metal retention lever to open the socket tray.
- Hold the CPU by its edges to avoid touching the pins or the top surface. Align the small arrow on the CPU with the arrow on the motherboard socket.
- Gently place the CPU into the socket without applying force. Lower the retention lever to secure it in place.
- Apply a small dot of thermal paste (about the size of a grain of rice) to the center of the CPU. This ensures proper heat transfer to the cooler.
Tip: If your CPU cooler comes with pre-applied thermal paste, skip the application step to avoid overdoing it.
Mounting the Motherboard and Connecting Power
- Before installing the motherboard, attach the I/O shield to the back of your PC case. Ensure it snaps securely into place.
- Install motherboard standoffs if they’re not pre-installed in your case. These are essential to prevent the board from shorting out.
- Place the motherboard into the case, aligning it with the standoffs and I/O shield. Secure it using screws, starting with the middle.
- Connect the 24-pin power cable and 8-pin CPU power cable from your power supply to the motherboard.
Installing Storage and Graphics Card
- For SSDs, locate the M.2 slot on your motherboard if you're using an M.2 drive. Insert the drive at an angle and secure it with the provided screw.
- For 2.5-inch or 3.5-inch drives, use the drive bays in your case. Secure the drives using screws or the provided brackets.
- To install the graphics card, find the PCIe x16 slot on the motherboard. Remove the corresponding slot covers on your case.
- Insert the graphics card into the PCIe slot until it clicks into place. Secure it to the case using screws.
Note: Some motherboards have multiple PCIe x16 slots. Refer to your manual to determine the optimal slot for your GPU.
Cable Management and Cooling Solutions
Organizing Cables for Better Airflow
A messy tangle of cables inside your PC not only looks bad but can also block airflow, making your components run hotter. Good cable management isn’t just about aesthetics—it’s about keeping your system cool and efficient.
Here’s how you can tidy up those cables:
- Plan your routes: Before plugging anything in, figure out where each cable needs to go. Cases often have pre-designed channels and holes for cable routing.
- Use zip ties or Velcro straps: Secure cables to the back of the motherboard tray or along the case's edges. Avoid pulling cables too tight, though—you might need to adjust them later.
- Bundle similar cables together: Group cables like SATA power lines or fan connectors. This not only looks cleaner but also makes future upgrades easier.
- Keep cables away from fans: Loose cables can get caught in fan blades, which is a recipe for disaster. Tuck them securely out of the way.
A little patience goes a long way with cable management. Take your time to test the fit and adjust as needed—your future self will thank you when you upgrade or troubleshoot.
Choosing Between Air and Liquid Cooling
When it comes to cooling your PC, you’ve got two main options: air cooling and liquid cooling. Each has its pros and cons, so let’s break it down:
| Cooling Type | Pros | Cons |
|---|---|---|
| Air Cooling | Affordable, easy to install | Can be bulky, less effective for high-end builds |
| Liquid Cooling | Excellent cooling performance, quieter | Higher cost, more complex to install |
If you’re building a mid-range PC, a quality air cooler is usually sufficient. For high-performance gaming rigs or overclocked systems, liquid cooling might be worth the investment.
Ensuring Proper Fan Placement
Fan placement is key to maintaining good airflow inside your case. Here are some tips to optimize it:
- Intake and exhaust balance: Place intake fans at the front or bottom to draw cool air in, and exhaust fans at the back or top to push hot air out.
- Follow your case’s airflow design: Many cases come with pre-installed fans. Add extra fans only if there are open mounts that complement the airflow pattern.
- Position fans near heat sources: For example, place one intake fan near your graphics card to keep it cool during heavy gaming sessions.
By combining smart cable management with an efficient cooling setup, you’ll create a PC that not only performs well but also stays cool under pressure.
Testing and Troubleshooting Your Build
Powering On and Initial Diagnostics
Before sealing everything up, it’s smart to test your setup. Start by connecting the essential components: motherboard, CPU, cooler, memory, storage, and power supply. Place the motherboard on its box or a non-conductive surface. Hook up your monitor and peripherals, then power on the system. If you see a display output, you’re off to a great start!
Quick Checklist for Power-On Testing:
- Ensure the PSU switch is turned on.
- Double-check all power cables are securely connected.
- Verify the CPU cooler fan or pump is running.
- Look for motherboard status lights or beep codes.
If nothing happens, recheck all connections or try reseating components like RAM or the CPU.
Identifying and Fixing Common Issues
Sometimes, things don’t go as planned. Here are a few common issues and how to address them:
| Problem | Possible Cause | Solution |
|---|---|---|
| No power at all | PSU switch off or loose cables | Flip PSU switch, reseat power cables |
| Power on, no display | Graphics card or RAM not seated properly | Reseat GPU and RAM |
| Overheating during boot | Cooler not installed or working correctly | Check cooler installation and connections |
For persistent issues, try clearing the CMOS to reset BIOS settings. Most motherboards have a button or jumper for this.
Updating BIOS and Drivers
Once your PC powers on and you can access the BIOS, check for updates. Manufacturers often release BIOS updates to fix bugs or improve compatibility. Most modern motherboards support USB BIOS flashing, making this process straightforward.
Updating the BIOS can resolve compatibility issues, especially with newer CPUs or memory modules. Always follow the manufacturer’s instructions carefully.
After installing your operating system, download and install the latest drivers for your motherboard, graphics card, and other components. Keeping these updated ensures your system runs smoothly and efficiently.
Installing the Operating System and Software

Setting Up the BIOS for First Boot
Before diving into the OS installation, you’ll need to tweak a few settings in your PC’s BIOS. When you power on your computer for the first time, press the designated key (usually Delete, F2, or F12) to access the BIOS. Here’s what to do:
- Confirm Hardware Recognition: Ensure all your components (CPU, RAM, storage, etc.) are detected.
- Enable Boot from USB: Navigate to the Boot menu and prioritize the USB drive containing the OS installer.
- Optional Memory Tweaks: If you’re using high-speed RAM, activate XMP (Intel) or EXPO (AMD) profiles for optimal performance.
Save your changes and exit the BIOS. Your system will reboot and prepare for the OS setup.
Installing Windows or Alternative OS
To install your operating system, you’ll need installation media, typically a USB drive with the OS installer. Here’s how to proceed:
- Prepare the Installer: If you haven’t already, create a bootable USB drive using tools like Microsoft’s Media Creation Tool for Windows or a similar utility for Linux.
- Plug and Boot: Insert the USB drive into your PC and restart it. The system should boot into the installer. If it doesn’t, double-check your BIOS settings.
- Follow the Prompts: Select your language, time zone, and keyboard layout. Then choose the drive where you want to install the OS. For a new SSD, you may need to create a partition.
Pro Tip: Always install the OS on your fastest drive, typically an NVMe or SSD, for quicker boot times and overall performance.
- Complete the Setup: Depending on your OS, you may need to connect to the internet and sign in with an account (e.g., a Microsoft account for Windows). Follow the on-screen instructions to finish the installation.
Downloading Essential Drivers and Utilities
Once the OS is up and running, it’s time to install the necessary drivers and utilities:
- Motherboard Drivers: Visit the manufacturer’s website and download the latest chipset, network, and audio drivers.
- Graphics Card Drivers: Get the latest drivers from Nvidia or AMD, depending on your GPU.
- Windows Updates: Run Windows Update to ensure your system is up-to-date.
For added convenience, consider using tools like Ninite to quickly install essential applications like browsers, media players, and communication apps.
Regular updates keep your system secure and running smoothly. Allocate time to check for updates periodically.
Optimizing Performance and Maintenance
Overclocking Basics for Beginners
Overclocking can give your PC a performance boost, but it’s not as scary as it sounds. Start with your CPU or GPU. Most modern CPUs come with built-in tools to safely tweak clock speeds. Always monitor temperatures when overclocking—use software like HWMonitor to keep an eye on things. If you’re working with a GPU, tools like MSI Afterburner make adjustments easy. Just remember, stability is key. Run stress tests like Cinebench or 3DMark after every change to ensure your system can handle the new settings.
Regular Cleaning and Dust Management
Dust buildup can choke your PC’s performance over time. Aim to clean your system every 3-6 months. Here’s a quick checklist:
- Turn off and unplug your PC.
- Use compressed air to blow out dust from fans, vents, and heatsinks.
- Wipe surfaces gently with a microfiber cloth.
- Check filters in your case, if any, and clean or replace them.
A clean PC runs cooler and lasts longer—plus, it’s oddly satisfying to see it sparkle again.
Upgrading Components Over Time
Your PC doesn’t have to stay the same forever. As new games and software demand more power, consider upgrading these parts:
- RAM: If you’re running 16GB, moving to 32GB can make a noticeable difference, especially for multitasking or gaming.
- Storage: Swap out older SATA SSDs for faster NVMe drives.
- GPU: If gaming is your thing, upgrading your graphics card every 3-4 years keeps you current.
When upgrading, always double-check compatibility with your motherboard and PSU. If you’re building for gaming, check out this guide on optimizing a computer for gaming to make sure you’re squeezing every bit of performance out of your setup.
A well-maintained PC is like a well-tuned car—it runs smoother, lasts longer, and gives you fewer headaches.
To keep your system running smoothly, it's important to focus on both performance and maintenance. Regular check-ups and updates can help prevent issues before they start. Don't wait for problems to arise; take action now! Visit our website for tips and resources to enhance your system's efficiency and longevity.
Highlight: Learn how to improve your system's performance and maintenance!
Wrapping It Up
Building your own PC might seem intimidating at first, but once you get started, it’s really just a series of small, manageable steps. By now, you’ve learned how to pick the right parts, put them together, and get everything up and running. Sure, there might be a hiccup or two along the way—maybe a cable doesn’t fit where you thought it would, or you forget to install a driver—but that’s all part of the process. The best part? You end up with a machine that’s truly yours, built to fit your needs and preferences. So, grab your tools, take your time, and enjoy the experience. You’ve got this!
Frequently Asked Questions
What tools do I need to build a PC?
You'll need a Phillips-head screwdriver, some cable ties, and possibly a pair of needle-nose pliers. A static wrist strap can also help prevent damage to your components.
How do I ensure my PC parts are compatible?
Make sure your CPU matches your motherboard's socket type, your RAM is supported by the motherboard, and your power supply can handle the total wattage of all components.
Is it hard to build a PC for the first time?
Not really! It's like assembling a puzzle. As long as you follow a guide and take your time, it can be straightforward and rewarding.
Do I need thermal paste when building a PC?
Yes, thermal paste is essential for proper heat transfer between the CPU and its cooler. Some coolers come with pre-applied thermal paste, so check before applying your own.
How long does it take to build a PC?
For beginners, it can take 3 to 4 hours, including setup and troubleshooting. Experienced builders might finish in 1 to 2 hours.
What do I do if my PC doesn’t turn on after building?
Double-check all connections, ensure the power supply is switched on, and verify that components like RAM and the CPU are seated properly. If it still doesn’t work, consult a troubleshooting guide.
Postar um comentário